

Painting black is one of those colors that may seem easy but in actuality it’s quite difficult to pull off well if you don’t have a solid understanding of color theory and light. One problem lies in the fact that as far as light is concerned black should only be reserved for your deepest shadows, so how do you shade something that is already black. At the other end of the spectrum, how do you highlight black and still have it read as black to the viewer (i.e. how do you highlight black without just making it grey).
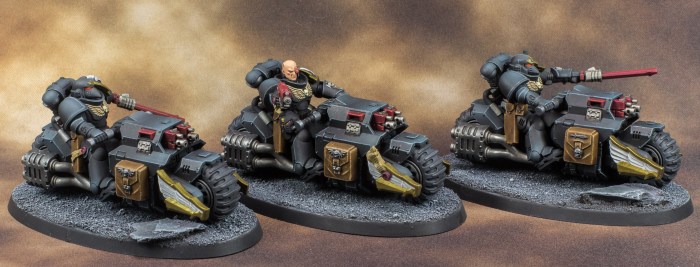
The only other time I painted black armor was the Talonmaster and if you look at the pictures in the gallery I didn’t even make an attempt to highlight the armor. The paint job consisted of an all over coat of flat black with edge highlights of a grey blue and that is pretty much it. So this time around I did some research on how to add highlights to black and still have it read as black. What I settled on was first airbrushing a coat of any flat black paint over the primer in order to get a deeper richer black. Then I airbrushed VMC Dark Sea Blue toward the front of the top panels on the bike and bottom section of the side panels as well as the corners of the panels on the back. I followed this up with glazes of the VMC Blue Grey Pale on the very edges of the areas I highlighted previously; I kept the layers thin making sure to never reach full opacity. The final step in this process was to then airbrush glaze a very thin layer of black over everything in order to tie it all together. That last layer was done gradually with a very thinned down black paint with multiple layers that were allowed to dry between each pass in order to evaluate the effect it had because otherwise you run the risk of going too hard to fast and simply painting it all black again. The edge highlighting was done with a mix of Blue Grey Pale and Dark Sea Blue.


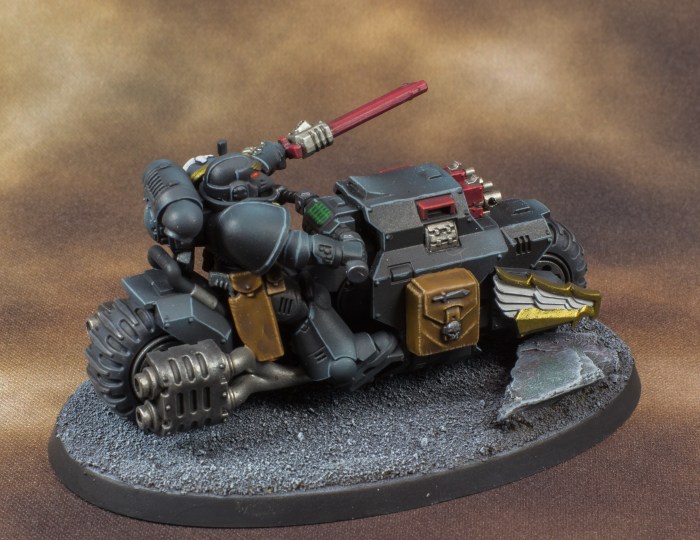
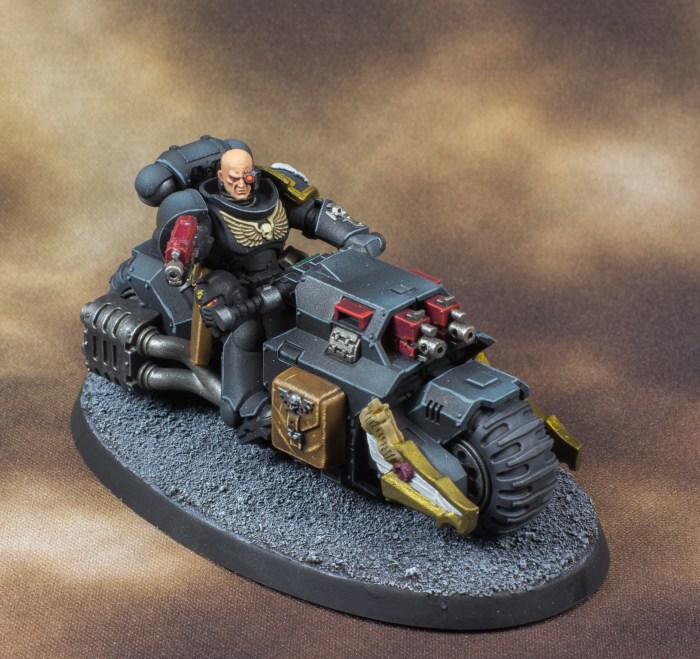
With the armor done I sealed it with a coat of matt varnish and went on to painting all the details. Anything that was red which was the chainsword and bolt rifles were given a base of AK Interactive Wine Red which is in my opinion a perfect substitute for GW Khorne Red. After wash of thinned down Nuln Oil I edge highlighted the red with GW Evil Sunz Scarlet. The gold metallics were done using Scale 75 Necro gold with a highlight of elf gold that you absolutely can’t see but at least the light wash of reikland fleshshade added a bit more warmth to the gold. The silver metallics were done using Vallejo Metal colors as opposed to the normal Scale 75 colors I would use. I started by basecoating all the metallics sections like the exhaust pipes, the chainsword teeth and the barrels of the bolt rifles with Metal Color Dark Aluminum which is a little bit lighter than GW Leadbelcher. I then decided to use Metal Color Magnesium on the exhaust cover on each side in order to break up the monotony of the Dark aluminum. Afterwards both the metallic sections were given a wash of thinned down Nuln Oil and that was that.


Any white sections were done using Pro-Acryl Bright Neutral grey with pure white edge highlights. This is the first Pro-Acryl paint I have used, it went on smoothly and had decent coverage but it felt a tiny bit grainy but I blame the primer for that texture. What had happened is that the needle on my airbrush was a busted was causing a weird texture that consisted of the paint coat being ever so slightly grainy. I realized what happened but only after I had finished priming so I just had to live with it. Eventually I will put the Pro-Acryl paints through its paces in order to finalize my opinion of them.
The leather sections were done using a different recipe than the one I used for the Eliminators and Infiltrators. This one is a bit simpler but achieves a pretty good worn leather look that isn’t too dark which pairs well with the black armor of the Ravenwing. It starts with a solid basecoat of Vallejo Flat earth followed with edge highlights of Vallejo Orange Brown. Then I mixed a bit of Orange Brown with Vallejo Dark Sands and painted highlights on the edges that consisted of small lines perpendicular to the edge and on any sharp raised areas.(see the photo below to understand). I would also add random thin lines on the main surface or paint a longer lines on the edge with the highlight color to simulate scratches. The final step is to do two or three washes of thinned down Agrax Earthshade in order to tie everything together and darken down the relatively light browns that were used.

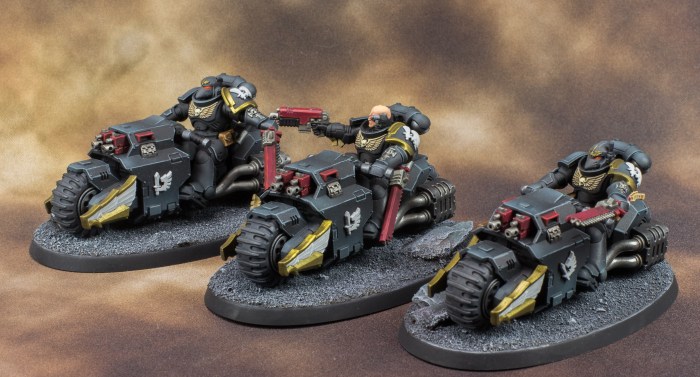
The wheels were tough to do because I wanted to paint the rubber black but I had to find a way to differentiate it from the black of the armor. So instead of painting it black I painted on a basecoat of black grey followed with a drybrush of black grey with a bit of white. Then to tie it all together and darken the wheels down I washed it in Nuln Oil and I was really happy with how it came out.
One other thing I did that was different from normal were the lenses on the helmets. Usually I do a lens effect where I base the lens in red and then layer orange and yellow in progressively smaller sections with a dot of white in the opposite corner. You know the standard lends thing most people show you. But this time I wanted to use Fluo paints and do a pseudo glow effect instead. Emil from Squidmar Miniatures has a video where he demonstrated the method I used here. Basically you first paint a layer of Rakarth Flesh from GW on the lens making sure to leave a ring of the original dark layer around the lens to act as an outline. Then you take a 50/50 mix of Rakarth Flesh and white and paint it on the center of the lens covering about 50% of lens in total. The last highlight is just a largeish dot of white in the very center of the previous highlights. With the highlights finished the last step is to apply the Fluo paint on the lens, making sure the paint is well mixed up first in order to get the best effect. Another thin layer was added after the first layer dried in order to amplify the effect. For the Outriders I may have been a bit heavy handed with the application of the Fluo paint but I think the effect is still passable, I just need to be more controlled with the Fluo paint next time.

The chest aquila was done the same way as always which is a base coat of Zandri Dust, heavy wash with Agrax Earthshade and highlight with Ushabti Bone, nothing special there. Similarly with the skin on the unhelmeted sergeant, I used the standard GW skin progression of Bugman’s glow to Cadian Fleshtone to Kislev flesh with intermediate mixes to smooth out the transitions. Lately I have been getting more confident with my skin tones and I feel that I need to experiment more and use more the paints I have available to me to bring more life to skintones.
Aside from the base that covers everything I did on the Outriders. I feel good about the recipe I used for black and in order to improve on the paint job it’s just a matter getting cleaner highlights both with the brush and the airbrush. One thing I could do to subtly improve the paint job is to recess shade with a Vallejo Hull Red, it wouldn’t be obvious but it would bring a nuance of warmth and contrast to the paint job as it generally consists of cooler tones. Also, I would need to either go into NMM for the metallics or learn how to due TMM properly with shades and highlights (i.e. don’t be lazy about doing the metallic bits) but that’s for next time.
Till We Meet Again My Wayward Compadres

[…] results). The leather on the Eradicators was done the same way as the leather on the Outriders (here) and so far I am really liking this particular recipe for the leather bits on my Dark Angels. Any […]
LikeLike
[…] of outriders recently, all I had to do was replicate what I did previously (which you can check out here). So all of the major colors were the same for the weapons, armor, parchment, leather, skin, […]
LikeLike