

So at the time of writing this, the world is deep in self-quarantine due to Papa Nurgle gracing the world with a new virulent gift. However, as I am employed by a utility company I am considered an “essential” worker and thus still commute to work 4 days a week. There was a lot of adjusting I had to do because safety protocols at work kept changing every week that I needed to get used to plus life as a whole is now very different. As such not much painting got done in March because of that and also I started transitioning to working on my displace piece for Capital Palette 2020 which is a different roller coaster.
But early in March I did get to finish my second Invictor Tactical Warsuit for my Dark Angels army as part of my monthly challenge from my local Warhammer group (Warhammer 401k). This time around I took what I learned from my first Invictor Warsuit and approached construction and painting a little differently this time around.
In terms of construction I decided to go with doing more sub-assemblies than last time. On my first Invictor I had trouble reaching certain areas with brush and ended up having to clean up quite of bit of over painting. So more of the armor plates were kept off, the arms and torso were kept separate and I kept the cockpit cage separate as well.
Another major thing I did different non-painting wise was how I did the base. Last time I used a resin base from Dragonforge Designs, specifically one from their slate wasteland line of bases. The base looked great but the problem was that I had a really tough time attaching the model to the base. For those of you who have never put one together there are two feet pieces on the Invictor and one them has three of the toes as separate parts that you need to glue on. This made it difficult to securely anchor them to the base which already had texture from grit and sand used to make the base and thus thus prevented a the feet from making flush, solid contact with the base. So this time around I glued them directly to the blank plastic base it came from first and then based it myself using my own materials.
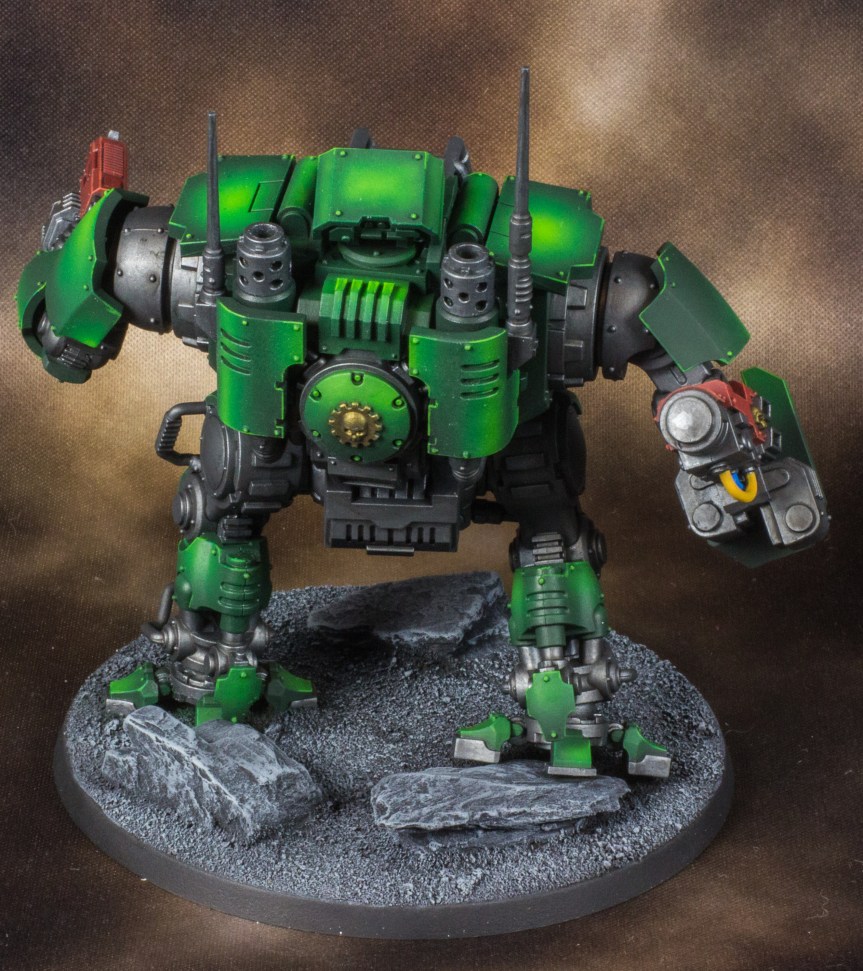
With construction and basing out of the way I moved onto priming and basing the Invictor. I used the same base paint as I did last time which was Scale 75 Misfits Green but changed up what I used for the highlight colors. This time around I went with Scale 75 Greenskin Flesh for the first highlight and Scale 75 Goblin Flesh for the top highlight because these paints were more saturated than the Army Painter ones I used previously. Another thing I did differently is that on the back armor plates for the engine I went for a green nmm effect but with the airbrush.

For the weapons I didn’t do anything different for the base colors and highlights but I did decide to experiment with effects. I attempted to do a muzzle burn/heated metal effect on the barrels of the Autocannon. I did some research and landed on using three different Ghost Tint paints to get the effect. First I laid down some Ghost Tint yellow on the front half of the barrel lengthwise. Next I slowly laid down Ghost Tint Magenta on the front third, making sure to leave some of the leave behind. Lastly I airbrushed Ghost Tint Blue on the ends of the Autocannon barrels, this resulted in an almost black color when layered on top of the other Ghost Tints. In retrospect I should have covered up more the yellow than I did and also I probably should have used purple instead of magenta but I’ll refine it on future projects.
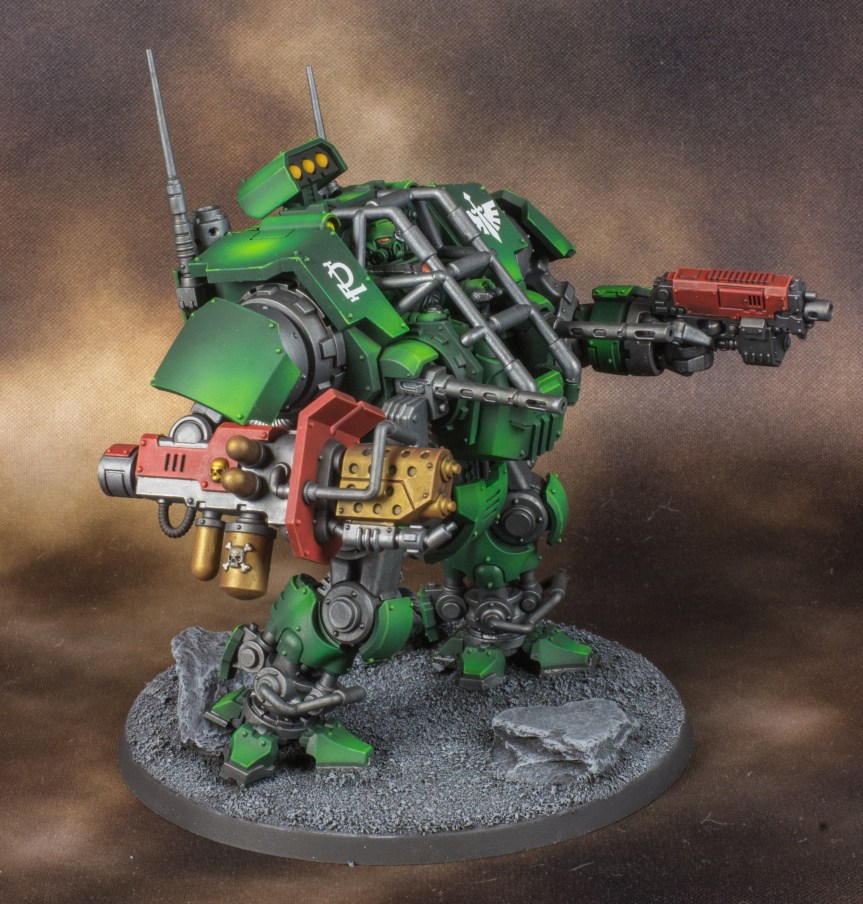
Another little thing I did different was the color choice on the Incendium Cannon. Instead of doing Scale 75 Black metal on the muzzle section I went for a more brass color instead after looking at other examples of the Invictor from other minipainters. It makes it look brighter but at the same time also makes it feel a bit flat and a little out of place. So if I ever make a third one I’ll stick to a normal steel color for the muzzle section.
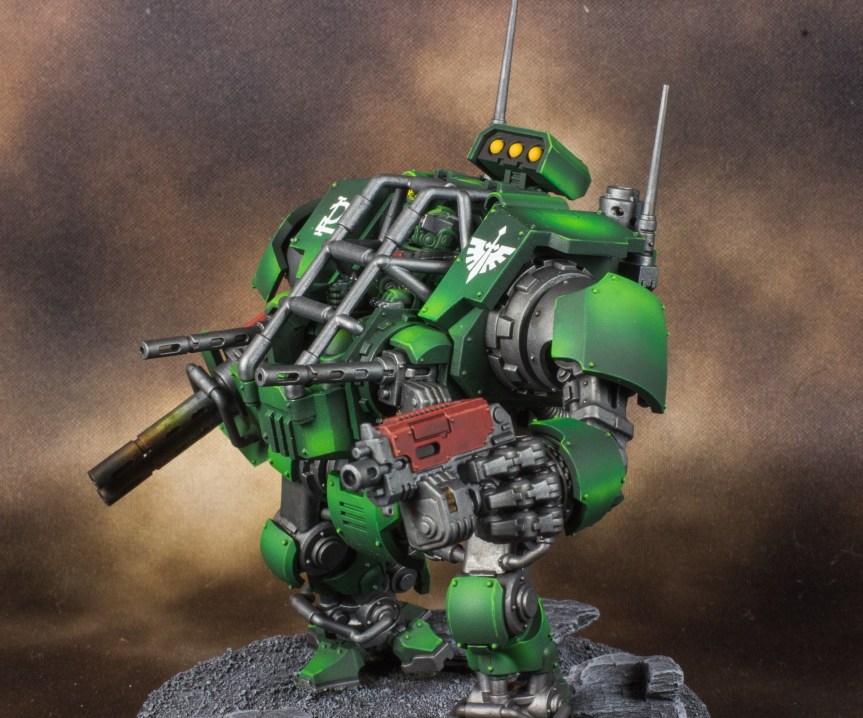
Overall, I think this Invictor came about better than the first one. The green is more vibrant and eye popping which is thanks to using the Scale 75 Colors. The base looks great, in fact when you compare it to the resin base on the first Invictor I don’t believe you can tell which one is resin and which one is homemade. For future projects involving large mechs I’ll most likely just make my own bases unless it’s a flyer because for those I like to get the solid acrylic rod from Dragonforge as it looks more aesthetically pleasing then the Games Workshop flight rod. I’ve got one more mini I finished in February so look forward to that (hint it’s another mech).
Till next time my wayward compadres.

[…] over how I did the armor since that has been covered previously with the second Invictor I did( Armor). The only difference this time around is that I decided to go with a pin wash on the armor using […]
LikeLike
[…] over how I did the armor since that has been covered previously with the second Invictor I did( Armor). The only difference this time around is that I decided to go with a pin wash on the armor using […]
LikeLike
[…] used for the last several projects. For the green armor you can check out the Invictor post here. The silver metallic sections were done using my usual Scale 75 Black metal and Thrash metal with […]
LikeLike